
Quick Start Guide: Set Up Your JrTrack 5
A step-by-step guide to getting your JrTrack 5 kids smart watch up and running with these six popular features.

For a complete walkthrough of JrTrack setup & features, see our user guide.
ONE
Explore the Parent Portal
If you want to add some more functionality to JrTrack 5, you can download some apps from our growing, pre-vetted and kid friendly app station! Educational games, music, and activities are all great options.
TWO
Add approved contacts
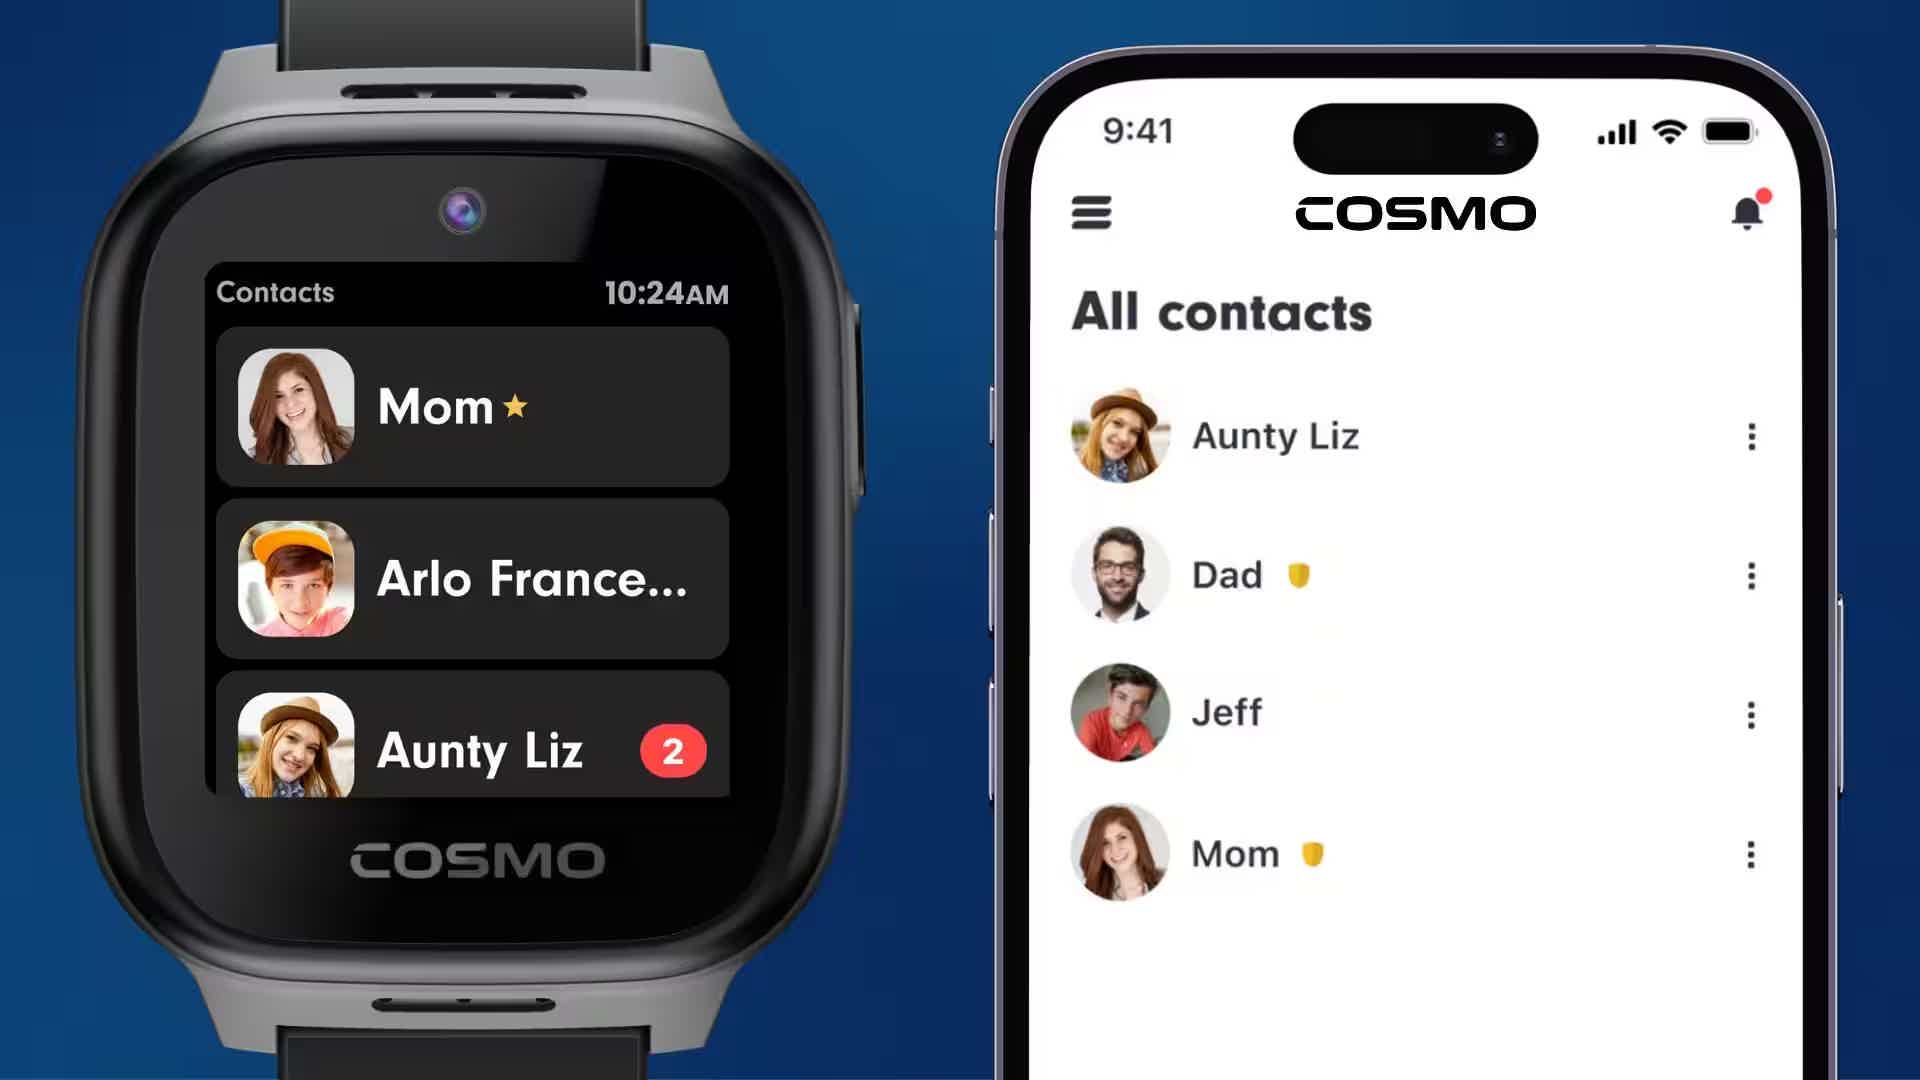
- In the parent app, tap the main menu (three lines) in upper left, and tap "All contacts"
- Tap the blue "plus" button on the bottom right.
- Add the info of the person you'd like to add, and select one of two account types with different permissions levels
- Adding a Guardian will send them an email invite to download the app & create an account.
- The Guardian must create an app account with the email you invited them with.
- Once they have accepted the invite, the new guardian will appear on the watch in the phone & messages apps for calling and texting.
- Contacts do not need to download the Mission Control app.
THREE
Set your GPS settings
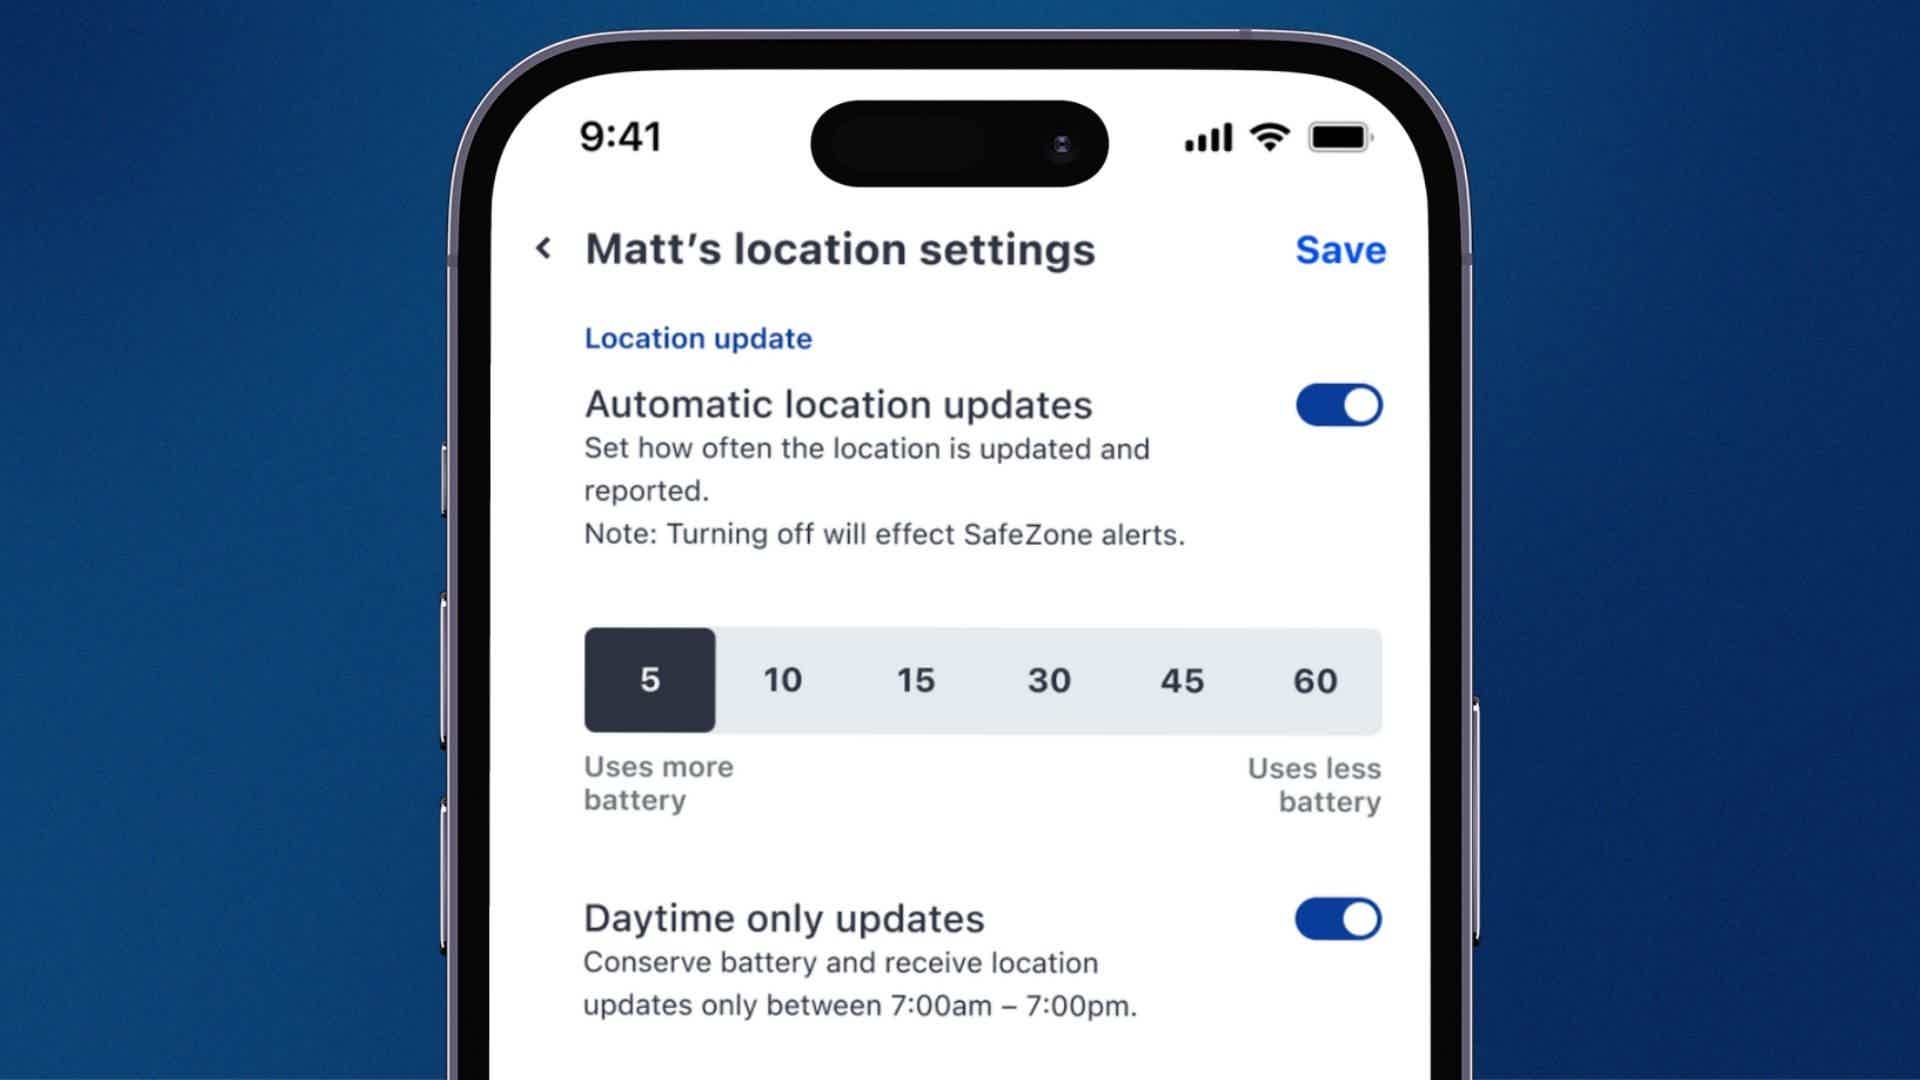
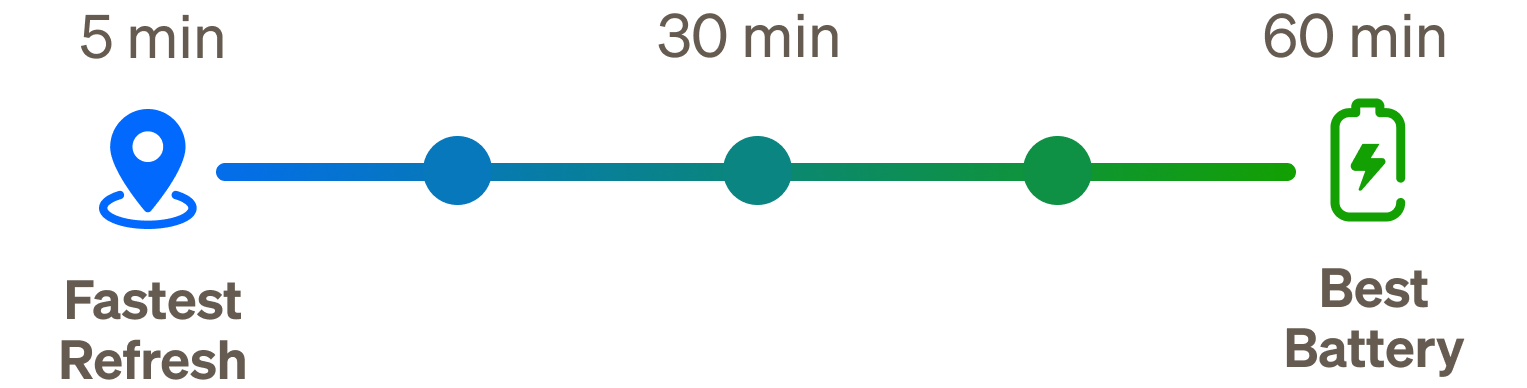
This setting controls how often location is refreshed while you are not using the app. By default, your JrTrack will update location every 30 minutes, but you can adjust this to give more frequent checks, or prioritize battery on the watch. Background refresh settings impact how quickly you'll receive a notification when your child enters or leaves a SafeZone you've set up.
Keep in mind that this setting is only for when you are not using the app. You can still see their location anytime by tapping on their device on the map, or by tapping the "Start tracking" button on the bottom right corner of the map screen, which enables Active Tracking. Active Tracking will update their location every 5-10 seconds for 15 minutes.
FOUR
Setup a SafeZone

- In the parent app, tap the main menu (three lines) in upper left, and tap "SafeZones"
- Tap the blue "plus" button on the bottom right.
- Long press the area that you want set the zone, or type an address in the address bar.
- Set the radius and the device(s) you want to apply to the SafeZone. Then tap Save.
- The primary Mission Control app account holder will receive entry/exit notifications based on location update settings.
FIVE
Select safety settings
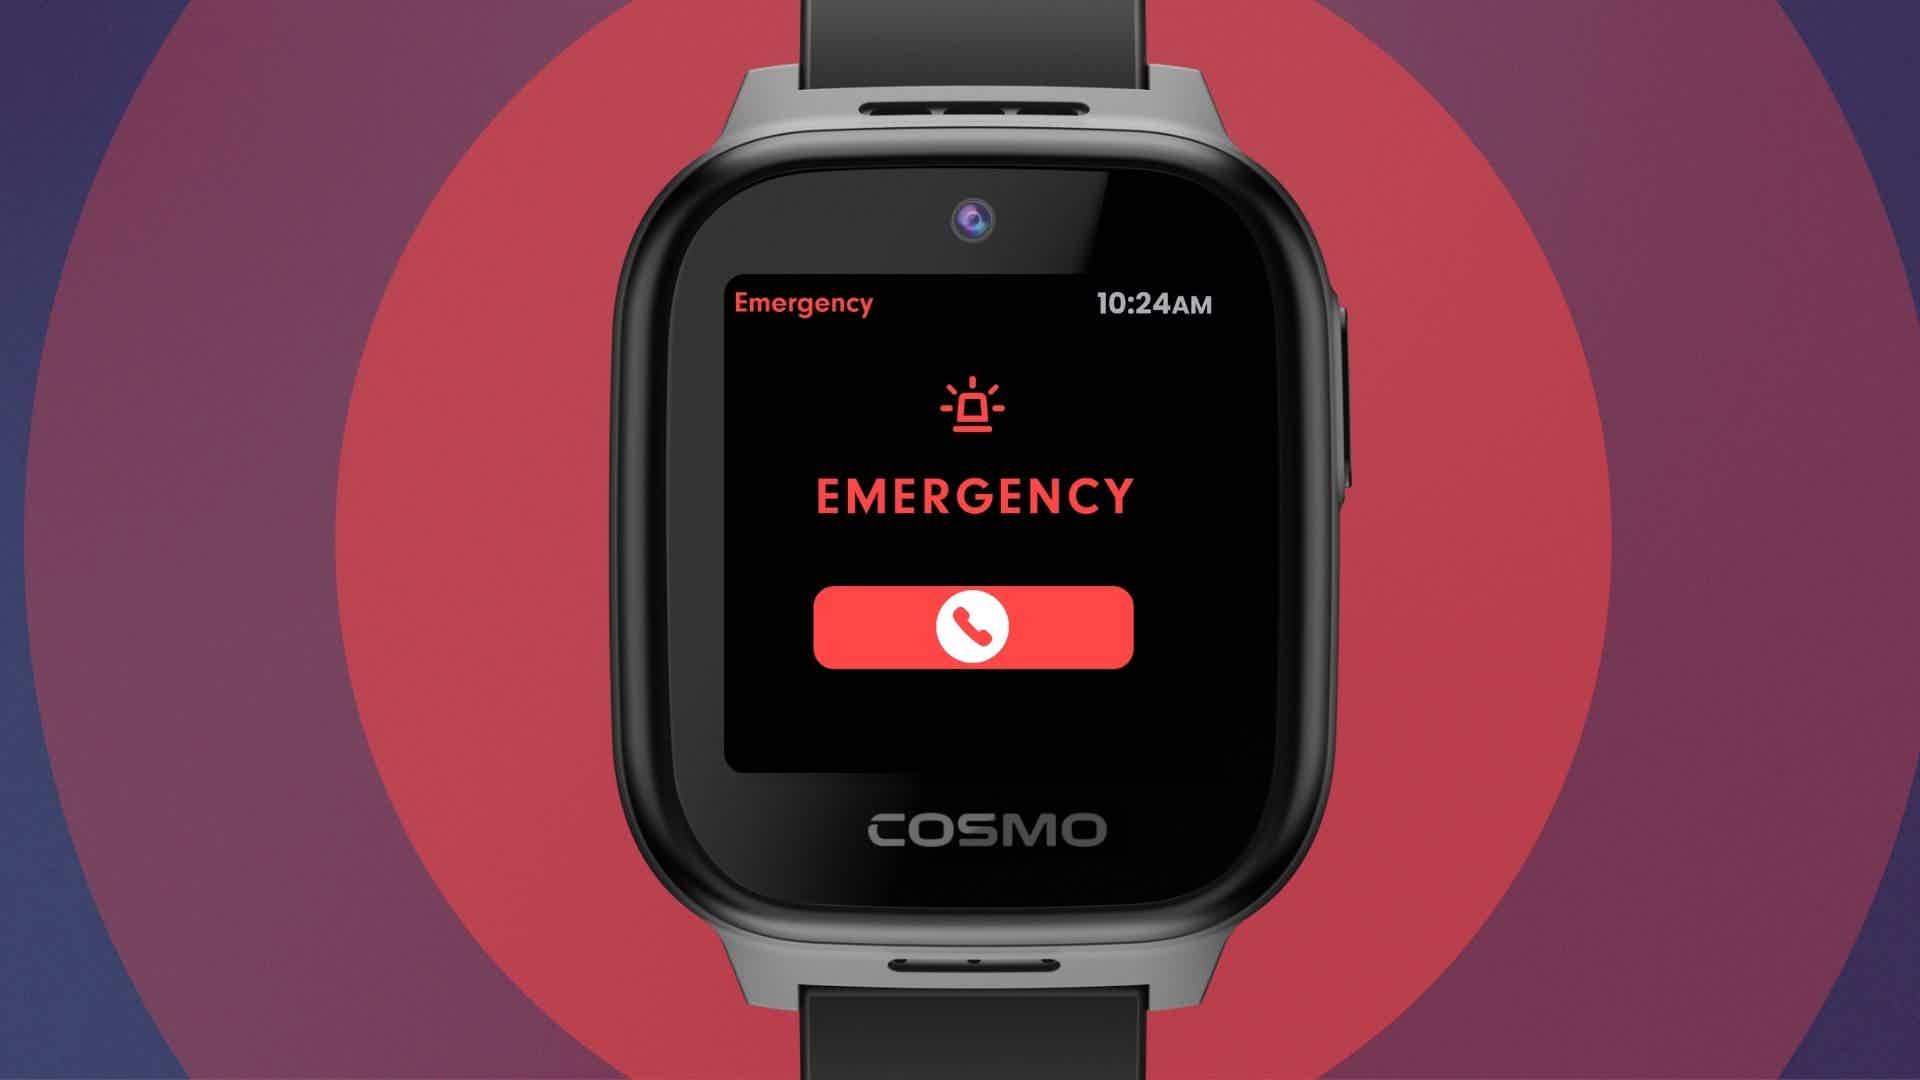
- On the watch, swipe to the settings app. Tap Device > Call options > Emergency calling.
- If you choose show, it will appear as an option in the phone app, below other contacts.
- 911 has a double-confirmation as well as a 5 second countdown to prevent accidental calls.
- SOS Mode allows your child to quickly and discreetly notify you in case they need to.
- To activate SOS, simply hold the power button on the side of the watch for 5 seconds.
- SOS Mode will automatically trigger an alert to the primary account holder's phone and begin live tracking for 15 minutes which you can check in the Mission Control app.
- While SOS Mode is enabled, all calls will automatically be picked up by the watch to allow you to hear what is happening, but your voice will be muted unless they turn up the volume on the watch. This is done to maintain secrecy in the event it is needed.
SIX
Schedule Focus mode
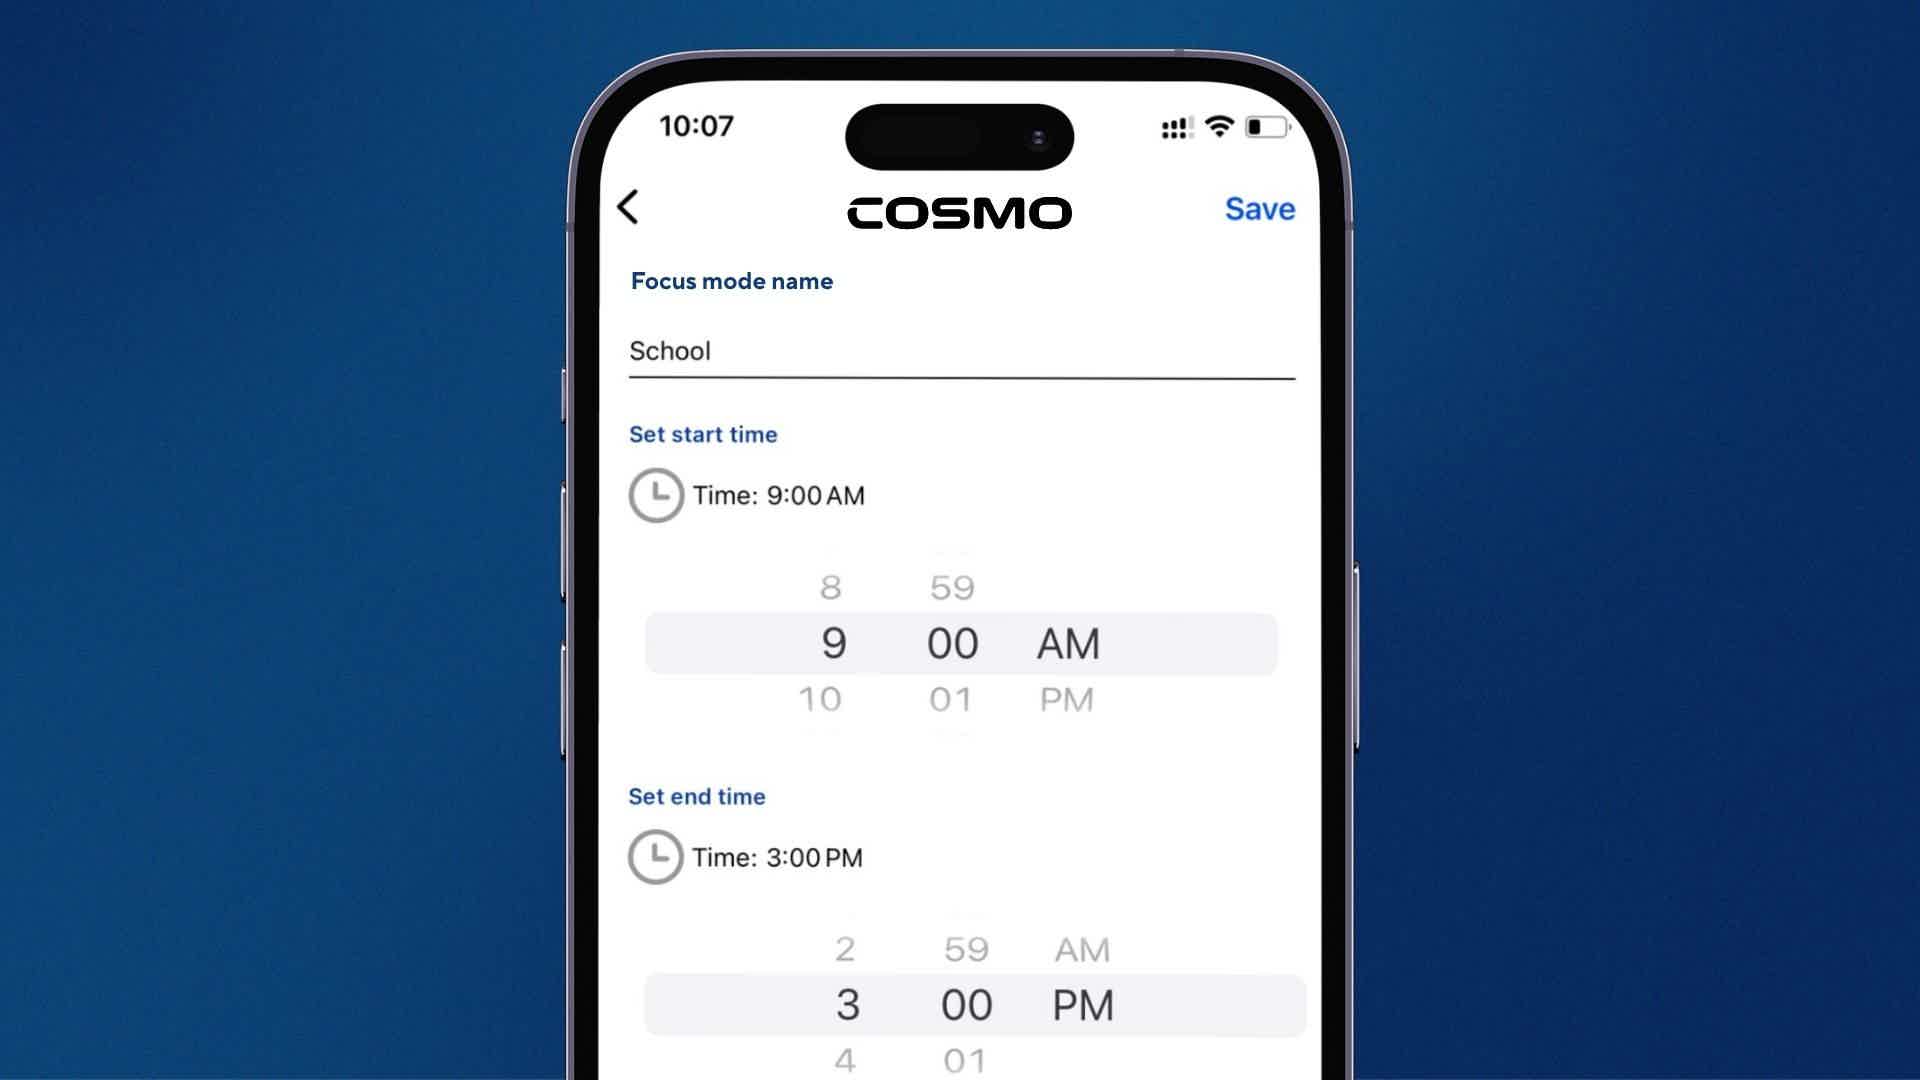
- In the parent app, tap the main menu (three lines) in upper right, and tap "Activity Center" > "Focus Mode"
- Tap the blue "plus" button on the bottom right.
- Here you can select a start time and an end time and name each designated focus mode time window.
- You can also enable the new "Lockdown mode", which also disables messages to Guardians.
SEVEN
Customize pre-set messages
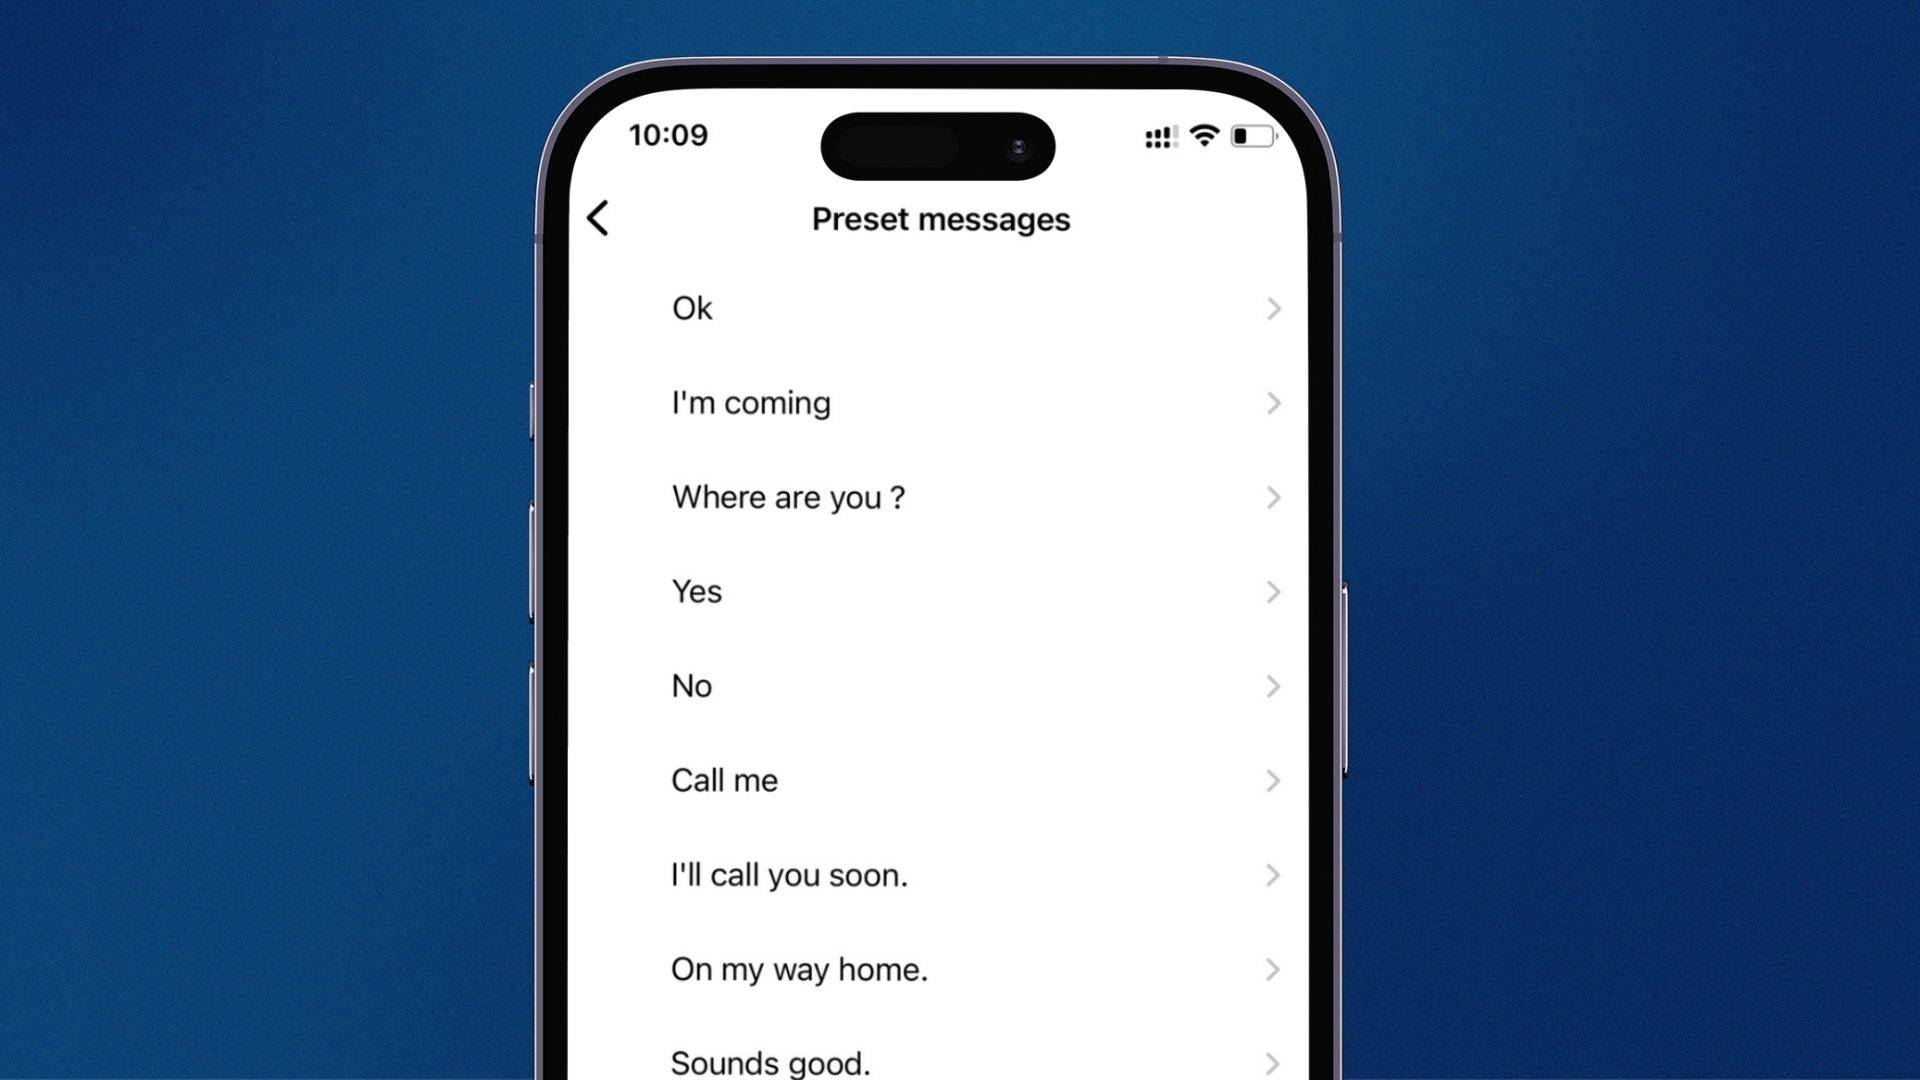
- In the parent app, select your device from the map screen. Then tap the grey gear icon in the top right corner. Next, tap "Preset Messages"
- Here you can edit any of the existing preset messages, or tap the blue plus to add your own. JrTrack can hold up to 20 preset messages.
- Tap "Save" to automatically populate your JrTrack's preset message list in the messaging app.